If you’ve ever tried growing lots of tomatoes at once, you know that tomato cages can get pricey quickly. However, using the Florida weave for tomatoes is a DIY trellising method that is budget-friendly, easy to install, and extremely sturdy. You can use it for both determinate and indeterminate tomato varieties and it will keep your bumper crop secure all season. Use this step-by-step guide to try the Florida weave for tomatoes.
What Is the Florida Weave Method?
Also known as the “basket weave” or “stake and weave” method, the Florida weave is a DIY trellis composed of sturdy wood or metal posts and a bit of twine. After the posts are driven into the ground in a row, tomato plants are planted between the posts, and then twine is woven in between the tomato stems and posts to keep the plants upright. Throughout the season, more twine is added to the trellises to keep tomato stems and heavy fruit well-supported until harvest time.
Benefits of Using the Florida Weave for Tomatoes
Using cages, stakes, and Florida weave for tomatoes all help these plants grow better by supporting developing fruit, keeping wayward plant stems tidy, and improving airflow around plant leaves. However, the Florida weave method has a few distinct advantages over other tomato staking options, including:
- Budget-friendly. Florida weave posts and twine are typically less expensive than buying multiple tomato cages. You may already have all the supplies you need for the Florida weave in your garden shed.
- Saves space. Unlike bulky tomato cages, Florida weave trellises don’t take up much space, so you’ll have more room for tomato plants.
- Adaptable. Tomato cages come in only a few standard heights, but Florida weave trellises can be extended as high as needed to support growing tomato plants. While Florida weave is typically used on indeterminate tomatoes, its versatility also makes it handy for trellising determinate plants.
- Easy to store. Metal Florida weave posts can be left in the garden all year, while wooden posts can be stored in an out-of-the-way spot in your garage or shed. Either way, Florida weave trellises take up much less storage space than tomato cages.
- Easier plant care and harvesting. Tomato stems and fruit are more accessible in a Florida weave trellis, so you won’t need to hunt through plant leaves when harvesting your tomatoes. This also makes it easier to spot tomato hornworms and other pests.
How to Use Florida Weave for Tomatoes
The best time to install a Florida weave trellis is early in the season before planting tomatoes. If needed, you can also add a trellis after planting tomatoes, but you’ll need to work carefully to avoid damaging plant stems and roots. Once you get the hang of using the Florida weave, try trellising other vining plants with this technique, including beans, peas, and cucumbers.
What You Need:
- 6 to 8-foot-long untreated wooden stakes, bamboo poles, rebar, or metal T-posts
- Jute, cotton, or nylon baling twine
- Post driver or sledgehammer
- Nails or tacks (if using wooden or bamboo poles)
1. Assemble the supplies.
Florida weave trellises can be made with all-natural wood posts and cotton or jute twine or with metal T-posts and nylon string. However, trellises made of metal and UV-resistant nylon twine last longer, and you won’t need to bring them indoors in winter if you don’t want to.
The number of supports you need depends on the size of your garden and the number of tomatoes you choose to grow. For a sturdy system, pick up two posts for each end of your tomato row, plus one additional supporting post for every two to three tomato plants you intend to grow.
2. Prepare the planting spot.
Before installing the Florida weave trellis, prep the garden bed by leveling the soil, removing weeds, and adding compost to boost soil fertility. Florida weave trellises can be used in both in-ground and raised bed gardens.
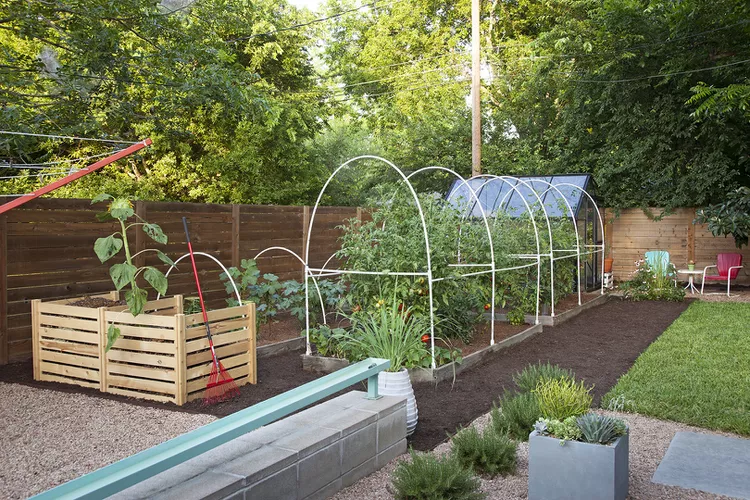
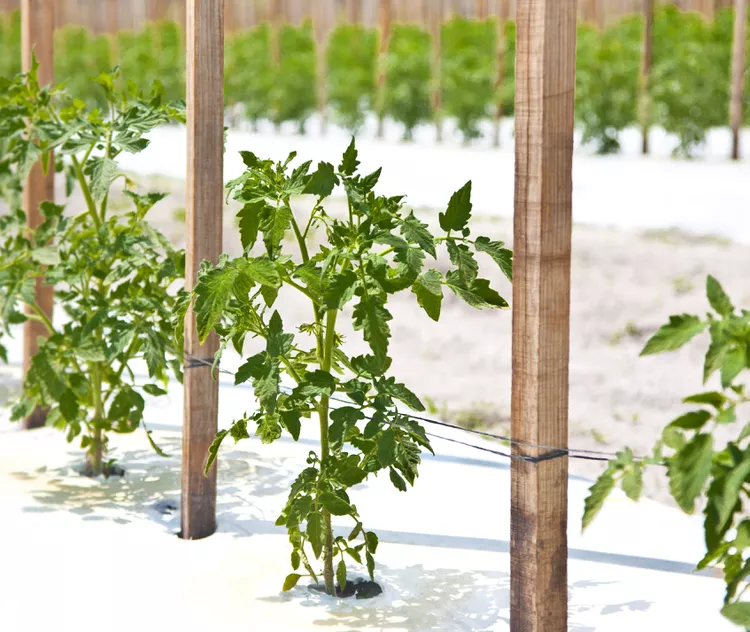
3. Install the support posts.
After you prepare the soil to accommodate a row of tomatoes, sink two supporting posts, side by side, on one end of the planting row using a post driver or sledgehammer. Install two more posts on the opposite end of the planting row and then add additional supporting posts at 2- to 3-foot intervals between the end posts. When you’re done, you should have a row of support posts buried 10 to 12 inches in the soil with at least 5 to 6 feet of the supports above the soil line.
4. Prune and plant the tomatoes.
Prune the tomato plants to remove suckers and damaged leaves, and then plant them in a row between the support posts. Space the tomato plants about 2 to 3 feet apart with approximately one support post for every two to three plants. To keep tomatoes from competing for light, choose either indeterminate or determinate-type tomatoes, but don’t mix the two types in a single planting row.
Don’t prune or trellis tomatoes during wet weather to avoid spreading plant diseases.
5. Add nails (optional).
Metal T-posts and rebar supports have a grooved surface, so they don’t need added tacks or nails to keep trellising twine in place. If you’re using wooden stakes or bamboo poles, you may want to add nails or tacks every 8 inches along one side of each support to keep the trellising twine from slipping.
6. Start weaving.
When the tomato plants are about 8 inches tall, it’s time to for the weaving part of a Florida weave trellis. Tie one end of the twine to the double support posts on one side of your row of tomatoes and then run the twine along the planting row, looping the twine twice around each support pole about 8 inches above the soil line. As you work, keep the twine tight to avoid slippage.
When you reach the opposite end of the row, secure the twine with a tight knot to the double support posts. Then, repeat this process in the opposite direction, securing a second length of twine to each support post while gently sandwiching the tomato stems between the two lengths of twine. When you’re done, you should have a row of twine 8 inches above the soil on either side of your tomato plants, and the tomatoes should be gently held aloft between the lengths of twine.
7. Repeat the weave.
As your plants grow, continue to weave additional lengths of twine through the support poles and tomato plants at 8-inch intervals until you reach the top of the support poles or your plants stop growing. Handle tomato stems and leaves with care as you tuck them between the trellising twine to avoid breaks and tears, and don’t tie the twine so tightly that it causes scarred stems. During the peak of summer, you may need to add additional lengths of twine once a week to keep up with fast-growing tomatoes.